Want to DIY tile your floor?
We recently tiled our bathroom floor. We YouTubed a lot of videos and read a lot of tutorials, but there were a few things that weren’t mentioned (or we just missed).
One note before we get started.
We are not tiling professionals (which will be obvious to you if you keep reading). This is not a how-to or intended for you to rely on as professional advice. It is just what we found worked and didn’t work for us. Tile at your own risk!
This post may contain affiliate links. If you have any questions, please see my disclaimer page.
With that out of the way, here is what we learned the hard way.
1. Get the right tools.
We started by renting a tile saw from our local big box home improvement store. After cracking about a million tiles, my husband went back and purchased a $100 tile saw from them. The cuts were so much easier with the purchased one. It turned out that the rented tile saw was too powerful for what we needed, which is why the tiles kept cracking.
2. Start in a small room.
Unless you are really confident in your tiling skills, start with a small room. We tiled a 5ft by 6ft bathroom, with all of the tiles precut, and it took over 4 hours to lay the tiles. Just to lay them with the thinset. Not grout them, either. That was another day. I cannot even explain how or why it took that long. If we would have started with tiling an entire kitchen, we would have likely thrown up our hands in despair prior to finishing.
3. Pre cut your tile, but wait to cut the last tile in each row until you are actually laying it.
We pre cut all of the tile prior to laying it and placed the spacers that we would use between the tiles (called dry fitting) to make sure everything was a perfect fit. It was foolproof, right?
Wrong.
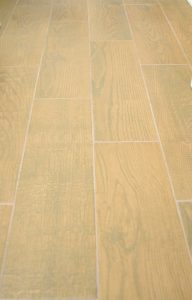
All of the tiles ended up with a little extra space between them due to the thinset underneath coming up just a little around the tile. This made the spaces slightly wider than they were when we dry fit it. Aesthetically, this was no problem as all of the grout lines were still the same width. However, when it was time to put the last tile in each row in, it was difficult.
Next time, we will dry fit all of the tiles, but will wait to cut that last tile for when we are actually laying the tile to ensure a not-so-snug fit.
4. Have two people there.
When you watch those YouTube videos, its one guy, holding the camera, while he tiles. Friends, it is not like that in real life. It is MUCH harder than it looks. Having two people there allows one person to back butter the tiles and hand the correct ones to the person actually putting the tile on the floor.
5. Cover the floor outside the room.
Tiling is messy. Luckily, we had huge black garbage bags right outside the room (Why, you ask? Who knows? I have three children…). They worked perfectly as a drop cloth.
6. Start from then outermost corner, away from your exit point.
My husband and I debated about where to start the tile. One of us was wrong, and we found out the hard way (I won’t tell you who was wrong).
Here is the right answer.

Start at the furthermost corner of the room from your exit. Work your way out. So for a small rectangle bathroom, this is the corner opposite of the door. This ensures that you have a clear path out of the room, and you are not sitting on any tile before they are set, and that you don’t have to look like you are playing Twister while you are laying the tile.
7. Make sure all of your tiles are level before you let them set.
Learn from our mistake. Double check. Then triple check.
We ended up with one pesky tile that is just slightly unlevel, creating a little edge between him and the tile next to him. It is probably only noticeable to us, but we were kicking ourselves for not noticing it prior to the tile being set.
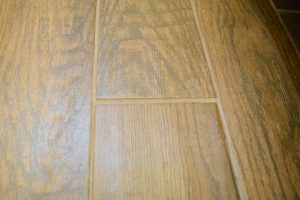

8. If you are using plank tiles, finish a whole row, length wise, before moving on to the next row.
We started by working in a small section, but then quickly found that tiling the whole row was going to work much better. So for us, this meant doing the whole row along the wall where the toilet sits. Then starting the next row, etc. When we got about three quarters of the way across the floor, we switched to putting the tiles in one by one across the tub. This made sure that we could get out of the room without standing on any of the tile.
This recommendation is likely only valid for plank tiles. I do not see this being as much of a problem if you are using square tiles.
9. When you put the tile down, smoosh it around a little.
Yes, that is the technical term (okay, its not). This will ensure that all parts of the tile are adhered to the thinset below it.
10. Use a rubber mallet.
A rubber mallet can be used to tap the tile into place, both on the top and on the edges. We had to do this to fit a tile to two in, due to the pre-cutting that we had done and the slightly wider grout lines discussed above.
There you have it! My big top ten tips for first time tilers.
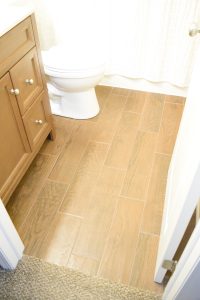
DIY tiling is definitely possible. My husband and I had never cut, laid or grouted tile (though I did watch the Home Depot guys tile a floor once… so I was basically a pro, right?). But we did it! And, it turned out looking pretty awesome.
Take a look!
Pin this post for later!