
Paint can make a huge difference in a room.
It can take a room from feeling small and tired, to feeling roomy and upbeat. A bad paint color can affect your mood and your sleep (really – look it up!). But a good paint color? Ah, its like a breath fresh air.
Now, good and bad are subjective terms.
What I think is good may be bad to you, and what you think is good may be bad to me. To each his own, right?
This post may contain affiliate links. If you have any questions, please see my disclaimer page.
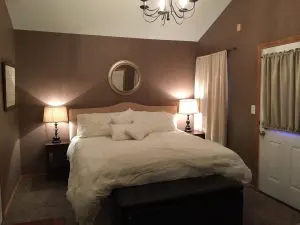
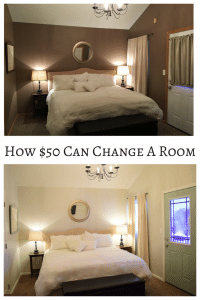
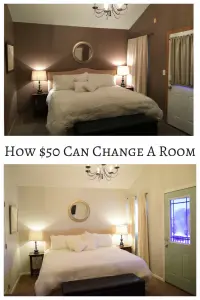
Here is the before picture of my bedroom.
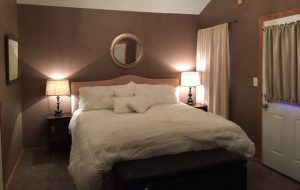

So dark!
The whole room felt stifled and dreary. A good brown can hold its own in any room, but this brown was purple-ish. Paired with the wood trim and the brown carpet, it was positively ugly! The brown paint did not go with the color of the wood trim or with the color of the carpet.
But, it was nothing a little paint couldn’t fix!
So I started with my foolproof whole house color scheme and chose a color. I had SW Steamed Milk on my whole first floor, and wanted to make the bedroom stand out a little, so I ruled that one out. My other favorite color for any room is Sherwin William’s Agreeable Gray. So, my team of painters (okay, just my husband and me) set to work.
For the trim, I chose SW Alabaster. The doors in the room were factory finished to be a slightly off-white, and Alabaster has just a touch of color in it. Truly, it just looks white, but it isn’t quite as stark white as some of the other whites. Here is an easy way to paint trim.
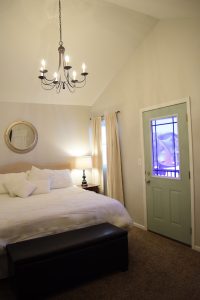
Last, I needed to paint the door that goes out to a little porch area. My kids had scribbled all over it, and it was not going to come off without considerable work. Plus, the dingy white color did nothing to add appeal to the room, and I wanted to have it add to the decor. I wanted something along the lines of SW Sea Salt, but more green. I happened to have a small can of Valspar Green Peppercorn from a different project. It was much darker than I wanted, but a great color. So I mixed some white with it and VOILA! My door color was born.
And while the paint brush was wet, I figured I may as well paint the frame on the other side of the room.
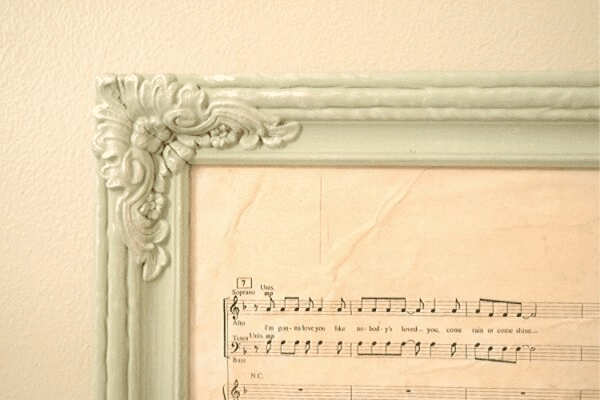
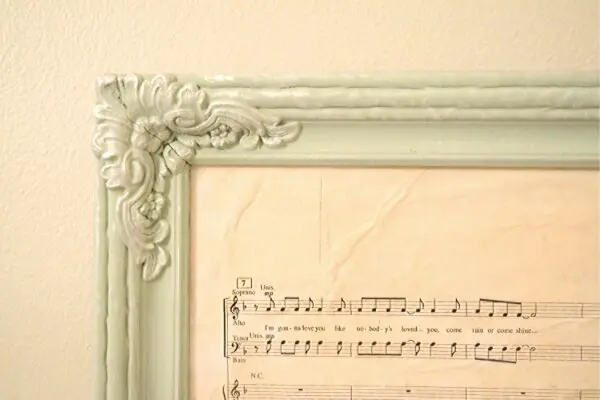
It was long overdue for a makeover, and would help balance out the color in the room , so why not? Here is how I used Rub N Buff to finish the frame.
Here is my after picture.
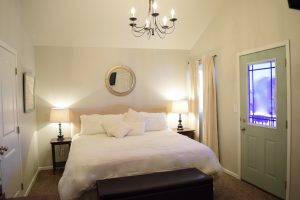
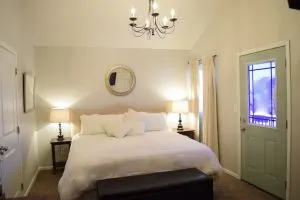
Such a difference!
As soon as my husband put the first roll of paint on I felt like I could breath again!
I love how the look came out! My four year old came in when we had finished and said, “Mom, the room is bigger!” Because it actually feels bigger now.
Look at them again, side by side.

The feel is completely different!
And that, my friends, is the difference that paint can make!
Are you bored with your house? Feel like it isn’t the style you want? You can spend an unlimited amount of money upgrading things and renovating it to make it just how you like. But, if you don’t have unlimited funds, paint is a cheap way to change the look and feel of your house.
The paint for this room cost me about $100. Trim paint is pretty expensive (around $75 dollars a can when it isn’t on sale). Luckily, I was able to get my paint on a 40% off sale, making it much more affordable. Plus, I only used about a quarter of the can of trim paint and still have over half a can of Agreeable Gray left. So in reality, the cost to paint this room was much closer to $50 since I still have a lot of paint left that I will use in other rooms.
$50 for this kind of transformation?
Amazing! I can’t wait to take on the rest of my bedrooms (which are also this same dark, purple-ish brown – shudder!).
How about you?
I hope this post is inspirational to you! Trying to make your house look good on a tiny budget can feel almost impossible at times, but take heart! Paint can truly make a huge difference!
If you have never painted before, don’t be intimidated. It is actually very easy, and there are tons of aids to help with the trim work (tape, trim painters, etc.). If you need some tips, check out this post on how to paint a room the easy way.
Here is one last picture of the finished product, just because I want to show off my new light I got from the Restore for $65!
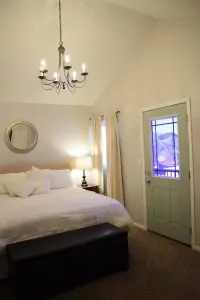
Let me know what you think in the comments below!
Jen
Saturday 19th of February 2022
Great advise! And it’s true- the hardest part is getting started when it’s a scary unknown zone- but the results are awesome and it feels so good that it’s a DIY!! P.S. I LOVE the Habitat for Humanity Restore in Brighton, Michigan!!
Lauren
Wednesday 23rd of February 2022
Yes! It feels so good to DIY! Thanks for commenting!
Lu
Sunday 2nd of August 2020
What color did you use for this amazing transformation? .... Thank you...
Lauren
Monday 3rd of August 2020
Hi Lu! The paint color is Agreeable Gray - such a pretty color!
Kathleen
Monday 13th of April 2020
Did u prime the walls before painting them?
Lauren
Tuesday 14th of April 2020
Hi Kathleen! No - I've only ever primed walls when I was painting new drywall. Other than that, I just go straight in with paint. Many paints are paint and primer combined, and while that is not exactly the same thing as priming first, it has always been good enough for me!
Katie
Wednesday 9th of October 2019
What color is the ceiling? Love the new colors!
Lauren
Wednesday 9th of October 2019
Thanks Katie! I didn't paint the ceiling, but I would imagine that if you went with Pure White or Extra White, you'd get a very similar look.
Jean
Wednesday 25th of September 2019
Love the After, beautiful!!
Lauren
Wednesday 25th of September 2019
Thanks Jean!